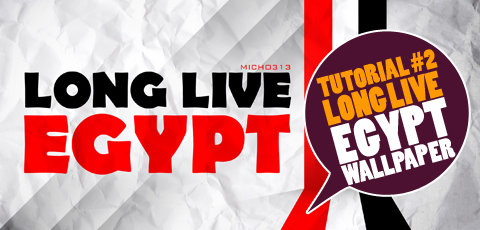
Today we will create Wallpaper dedicated to Egypt using Photoshop CS2 or later ver. and as we used to we will put all the shortcuts we use between ( )
The final result
Step 1:
Create a new file (ctrl+n) with this parameters.
Add layer style to background layer Gradient overlay with colors Grey #dbdbdb & White #fffff
Step 3:
Open a High Res paper Textures from google you can find it here
High res paper textures drag it to our file
make the image grayscale go to Image>Adjustments> Desaturate (ctrl+shift+u),
then adjust the image level by go to Image> Adjustments>Levels (ctrl+l) and set the blending mode to soft light.
Step 4:
Draw rectangle using rectangle tool (u) and fill it with color #ff0000 red
Step 5:
Duplicate this layer (Ctrl+j) and move it using move tool (v) to right, then fill it with color #000000 Black
Step 6:
Repeat the previous step and this time fill it with color #ffffff White
Step 7:
Now we have the flag of Egypt.. select the 3 layers and duplicate it (ctrl+j) and use free transform (ctrl+t) to adjust the position ,then select the down left and right anchor holding ctrl key and move it to get result like this
Step 8:
Create a new layer (ctrl+shift+n) and using the marque tool draw rectangle and fill it with gradient tool (g) with black #fffff then deselect the marque by hitting (ctrl+d) and set the opacity to 30%
Step 9:
Duplicate the last layer (ctrl+j) then use free transform (ctrl+t) and use right click and select Flip Vertical and move the shape down, then select the down left anchor and move it to the left holding ctrl+shift key and do the same to the right one.
Step 10:
In this step we will add some effects to our design, Create a new layer (ctrl+shift+n) under the flag colors and draw rectangle using Marque tool (m) and fill it with gradient tool (g) with black and white gradient #fffff & #00000
Step 11:
Use free transform (ctrl+t) to rotate the shape 45 degree by holding shift key while rotating and set the blending mode to Multiply and the Opacity to 20%.
Step 12:
Duplicate this layer and change the position of it using move tool (v) for our design i made it twice.
Step 13:
now we will add some text using text tool (t) and write whatever you want to say to Egypt with black color #00000 and red one #ff0000
Step 14:
We will add some effects to text, Create a new layer (ctrl+shift+n) and by using marque tool (m) Draw oval shape to select the oval shape hold the mouse on the marque tool and select the Elliptical one.
now go to Select>Modify>Feather (ctrl+alt+d) and set it to 50 px
Then fill it with whit color #fffff (ctrl +back space)
Step 15:
Now open this Texture Paper i found it through google as usual Here
and drag it to our file set the blending mode to multiply and the Opacity to 50%
Step 16:
Final touch to our design... Create a new layer (ctrl+shift+n) draw oval using marque tool (m),
Then Select>Inverse (ctrl+shift+i), go to Select>Modify>Feather (ctrl+alt+d) and set it to 50 px
Fill it with black color #00000 and set the blending mode to overlay.______________________
And Here We Go


No comments:
Post a Comment